

Quickstart
Open a small PyTorch model, inspect its tensor shapes, and find a layer's Python. You can follow the same steps with your own model.
Before you start, install TensorViz and choose a Python environment with PyTorch installed. The coding-agent plugin preview requires Apple Silicon macOS, CPython 3.12, and CPU capture. For JAX and Flax in the editor, see the framework guide.
1. Create a model
Save this as model.py in an open project folder:
import torch
from torch import nn

# tensorviz: input=1,16
class MlpTiny(nn.Module):
    def __init__(self):
        super().__init__()
        self.proj = nn.Linear(16, 32)
        self.activation = nn.ReLU(inplace=True)
        self.head = nn.Linear(32, 4)

    def forward(self, x):
        return self.head(self.activation(self.proj(x)))
The comment supplies an example input shape: one item with 16 features. TensorViz uses it when no saved setup or unambiguous example call supplies the inputs. You can review and change inputs before a capture.
2. Open your first graph
In your editor: click Open as Graph above MlpTiny. You can also run tensorViz: Open as Graph and choose the class.
In your coding agent: start a new chat in the project folder and ask:
Use TensorViz to open MlpTiny in model.py. Use an example input with shape [1, 16]. Ask me which Python environment to use if one is not saved.
Confirm Python and the example input if asked. TensorViz asks before library changes and saves a complete setup in tensorviz.toml.
Capture runs your code. Opening a graph executes one forward call of the model with the inputs you chose. Inspect source only opens a preview without running the model.
3. Inspect the result
The graph connects proj → activation → head, with input and output cards around them.
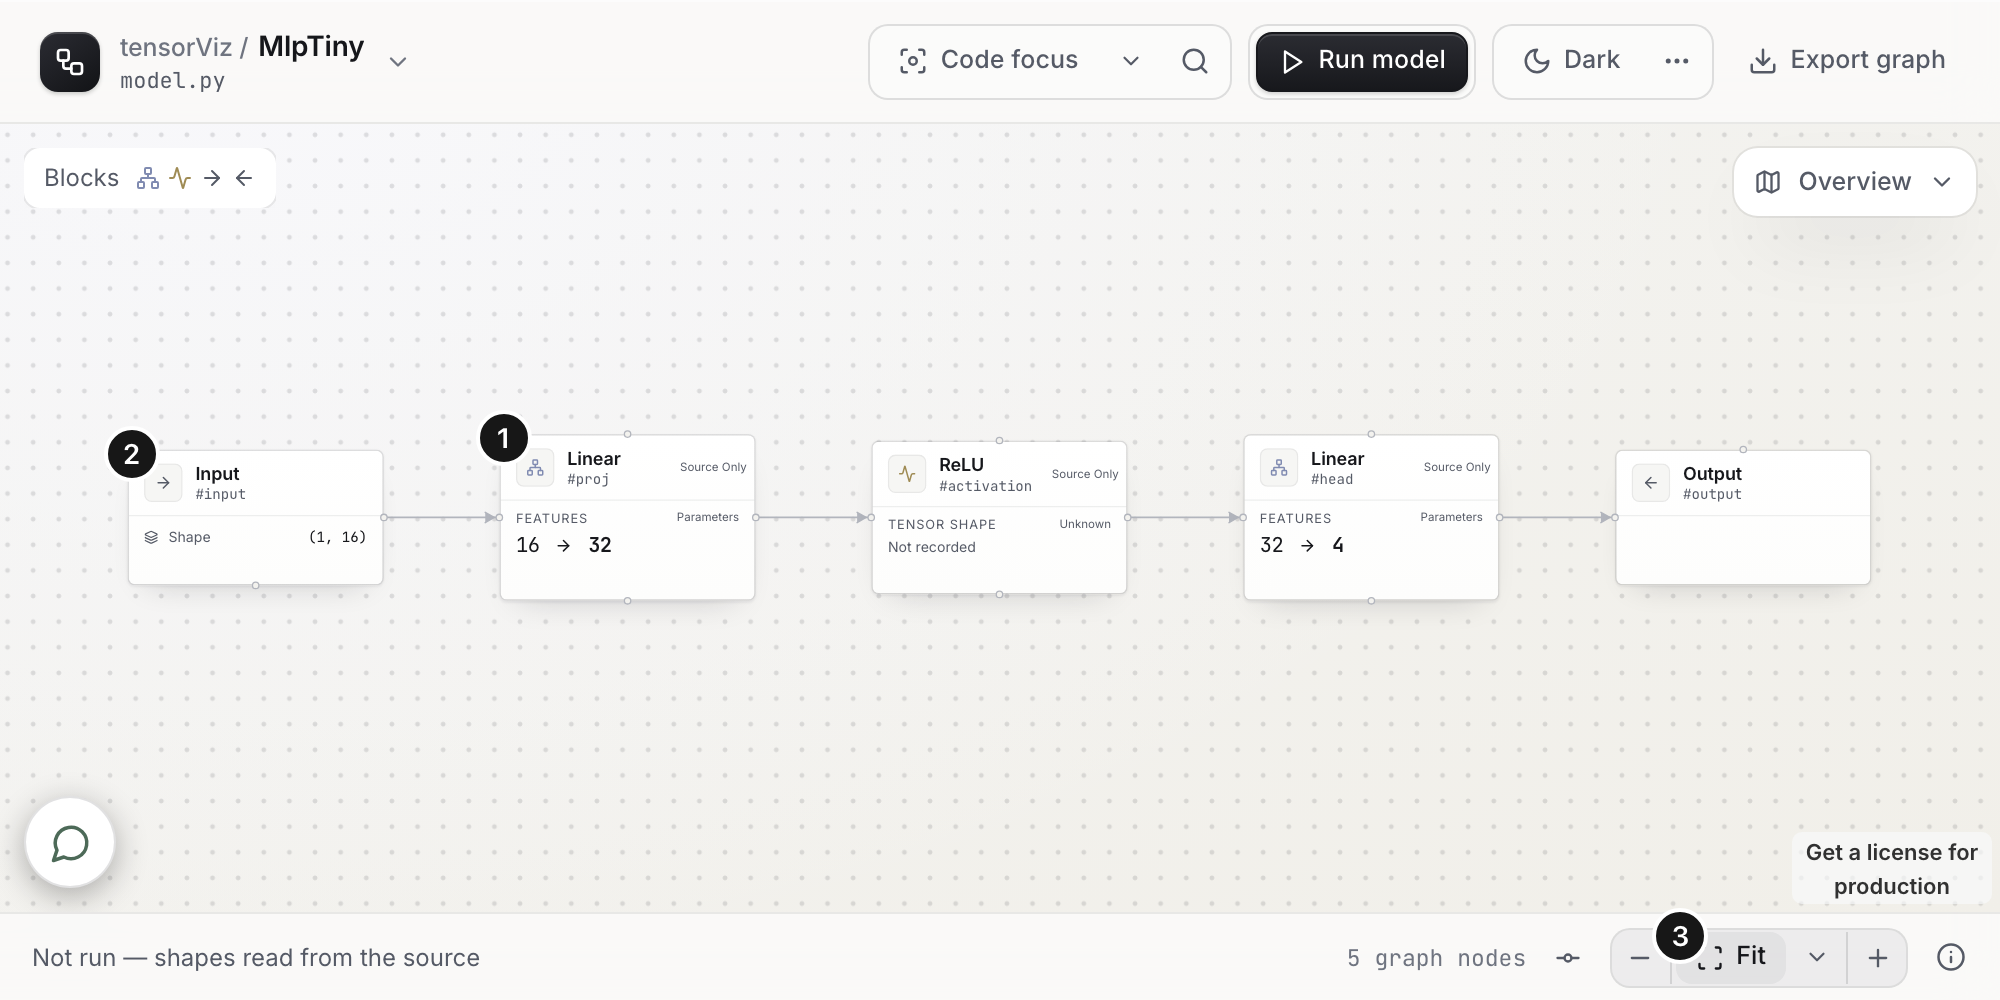
This screenshot shows the source preview. Run the model to record shapes; the preview alone does not measure them.
After a successful capture with input [1, 16], the expected shapes are:
| Layer | Input | Output |
|---|---|---|
proj · Linear | [1, 16] | [1, 32] |
activation · ReLU | [1, 32] | [1, 32] |
head · Linear | [1, 32] | [1, 4] |
Select proj and enable Code focus to find its nn.Linear(16, 32) declaration. Pan, zoom, and explore without running another capture.
If shapes say Not recorded, check that a capture completed. Inspect source only does not produce recorded shapes.
If opening stops
| What you see | What to do |
|---|---|
| No Python, or import errors | Environment recovery and model libraries |
| Choose a setup method | Setup and inputs |
| Capture failed | Fix the source or the inputs, then Run again |
| Agent cannot see tools | Start a new chat. For the extension, see Connect MCP |